Wednesday, March 30, 2011

Transformation

Pin It
A while back, OK, its been a long while back, I posted a find, do you remember this?

Hmm. what it the world would we want with this old thing?

Well, Mr has worked his magic again and now we have this.

So cute, a metal top, casters on the bottom for easy moving around and shelves on top. Anyone would like this for their home. It could be used just about anywhere, too, Bedroom, kitchen, country dining room, etc. Sorry you had to see the background, but I used my Iphone for the picture, it does just about as good as my regular camera.

Tuesday, March 29, 2011

Thoughts and a giveaway

Pin It
Well, I am having a day...

I lost the USB cord to the Ipod player... (update: I found that one - Thank the Lord) (crazy place tho - hmm, maybe I need to be checked for Alheimer's...)

I lost the SD card for the camera...

I cannot find a USB cord that will fit the camera to download the pictures...

I have looked and looked, but I am trying to leave this in the Lord's hands and hope that I will remember when the time is right. I pray about this and then I snatch it right back and run to another place and start looking there. I have sorta cleaned out a few places in my search, but that is a whole other story.

Maybe the solution is a new camera, the one I have is just a simple point and shoot. But I need want a fancy, dancy camera with one of those long lens that take incredible pictures and then I remember that I am a simple person, those fancy, dancy camera are heavy to lug around, and I need to be content with what I have.
*****************

Well, Life on our farm is having a giveaway. This young lady is making a custom made notebook to give away to a lucky - no blessed individual.

Check this out at  http://lifeonourfarm-oklahomafarmgirl.blogspot.com/2011/03/giveaway_29.html#comment-form

So much talent should NOT go to waste!

Sunday, March 27, 2011

Coffee Punch Recipe

Pin It
I have had this wonderful Coffee Punch at several wedding, graduations, etc. So, so good!

I'm sorry that I do not have a wonderful pictue of this treat

Frozen Coffee Punch

2 Gallons regular milk
2 quarts Half & Half
1 pink cream
2 pints non-fat creamer - French Vanilla
4 ounces instant coffee - dry (decaf if you plan on evening event)
12 ounces Hershey's Chocolate Syrup
1 tsp salt
4 ounces Vanilla (the real stuff)
2 Cups Sugar

Warm some of the milk and dissolve the instant coffee, sugar and chocolate syrup in it. Add the rest of the liquid and freeze in a container that you can slush in later. Defrost and serve when slushy.

This can be doubled or tripled for the amount of people you want to serve.  Looks wonderful in a punch bowl. And you will have them coming back for seconds.

Friday, March 25, 2011

No Sew Rug Making Tutorial - Part 2

Pin It
This is the second in a series of a fabric rug tutorial. I have to give credit to my friend MZ for showing me how and her aunt RR for showing her. This is a unique method that I have never seen instructions for. It has been passed down by word or mouth for years. Those that have know how, have been generous enough to share the method with us.

If you missed the first part, you may want to catch up by going here:

http://wildberryranch.blogspot.com/

Also, check out instructions again here


Picking up from where we left off on my last post, we made strips and we made holes in the ends of the strips.

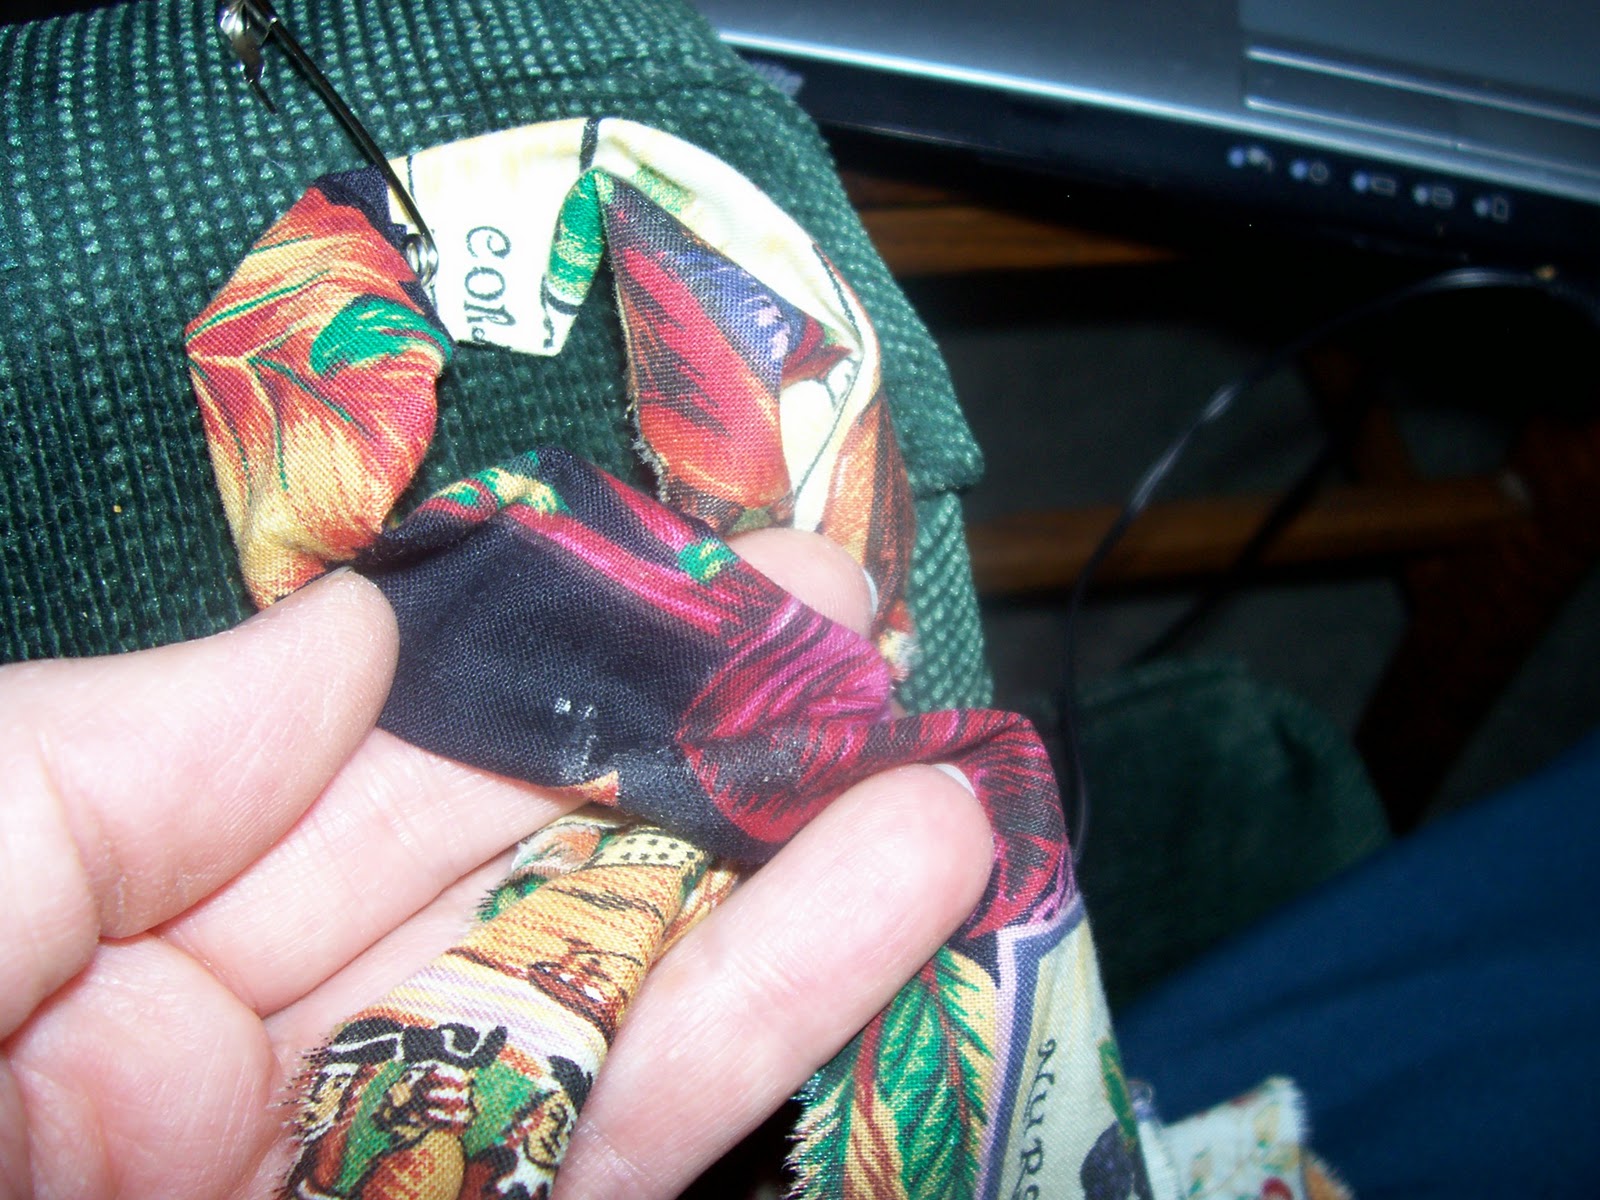
Now, on the end of two strips, fold them into thirds, then into thirds again, so that you have a very narrow folded end.


Secure this with a safety pin. Safety pins make it easier to go into the holes. I don't know what our grandmothers used, but these work great for me. They do not have to be extra large, but the little gold ones that you use to secure that gap in the front of your blouse will not work. They are going to be used over and over and they just don't have enough umph for me. In fact, the large ones (not the honking ones!) are really good.

Next, join two strips. This is easier than I will make it sound. Right sides up, on your lap, a table, etc, lay down one strip and put another strip over the top, matching the holes. Just like you are extending the strip.


Take the top strip and find the end with the safety pin, bring it up from the bottom through both holes.


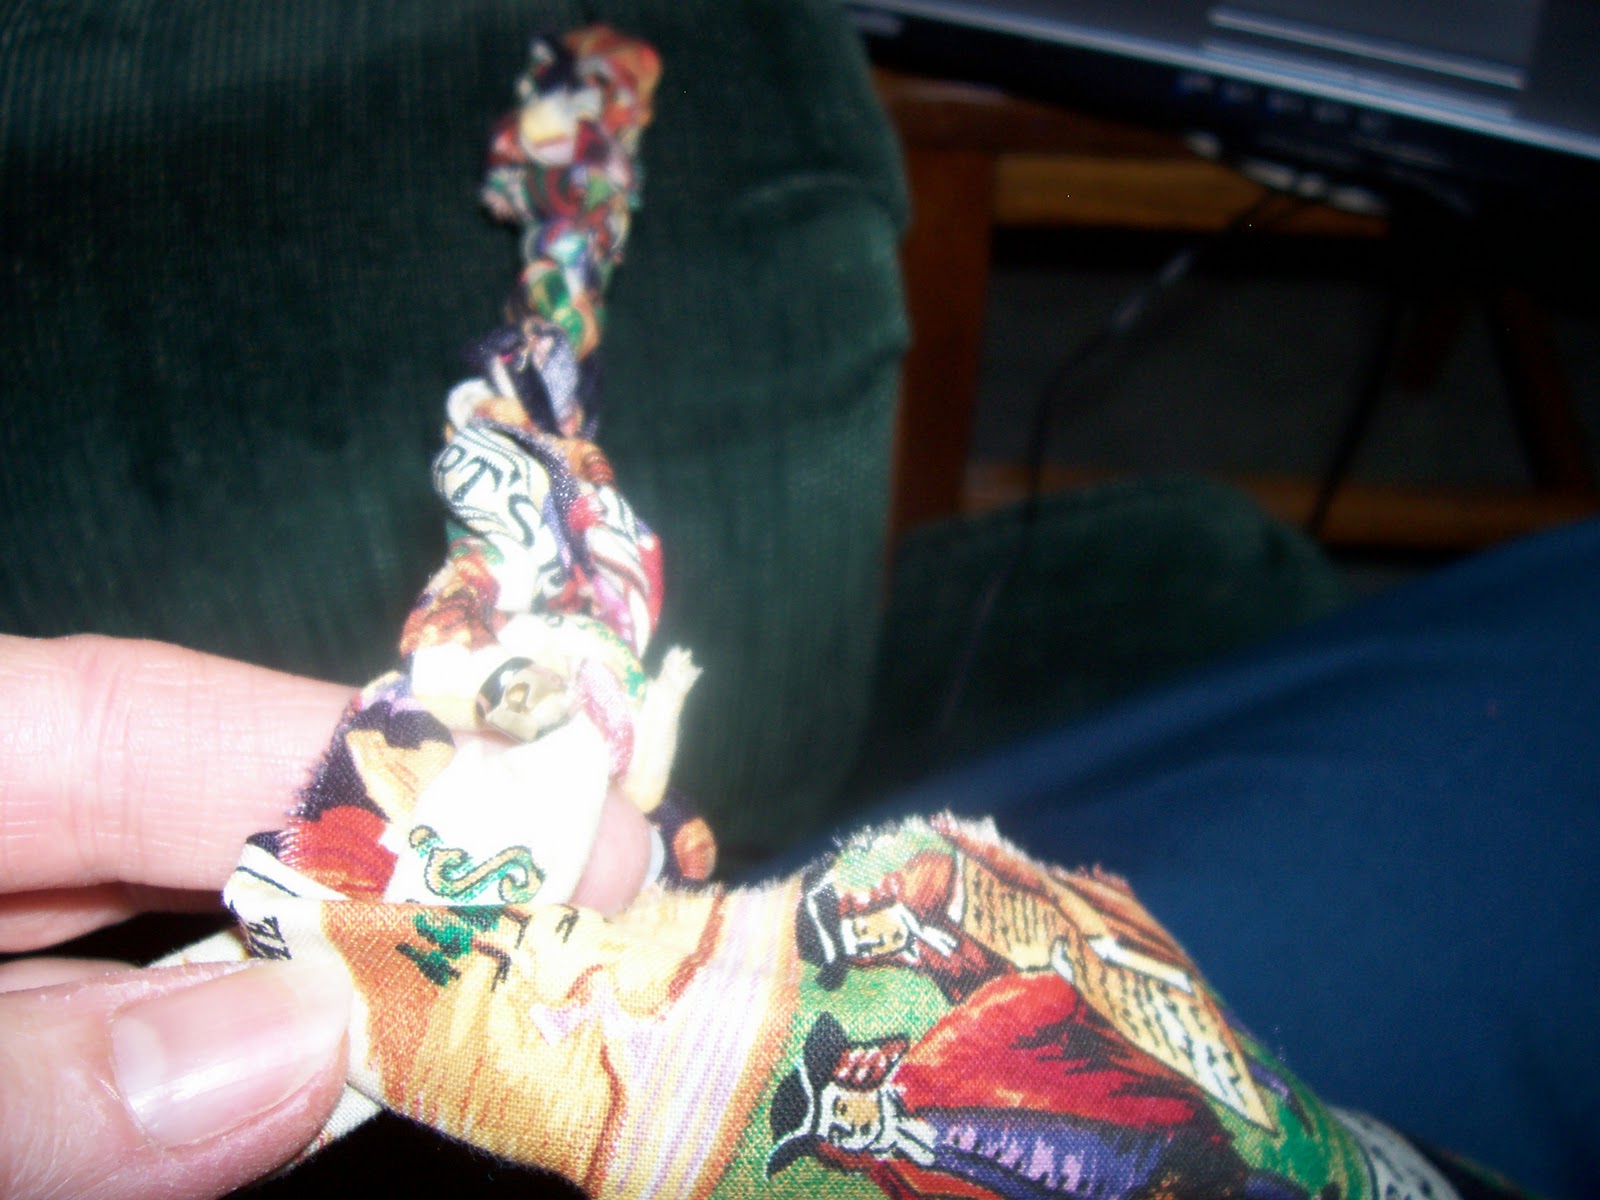
Pull it through until they are joined. If you pull too tight, then you will have the ends come through. Don't do that. Just pull enough that they join. Here is the back (fabric wrong side)


and here is the front.

It will not lay perfect, the side will "roll" out, don't worry...as you work with the strip you can (and this is a personal preference for me, roll the edges to the back, so that they are encased in the knot. Some don't do this and they are perfectly happy with their results.


The middle of the rug is the hardest and this seems like it will never come together (you are saying - when do we start? !) OK, I like to not have the start at the seam of the two strips, so I make one strip a little longer than the other by moving my "center" down just a little, perhaps 4 - 5 inches. Pin it to a surface.


This can be the fabric on your leg (ouch!) or the arm of a chair. Start making knots, tying them the same way, left strip over the right, or the right strip over the left. Be consistant.


 Don't draw them real tight. Do several and you will notice that there are holes, you will use these.


When you feel you have enough for the center line of your rug, turn the corner, ( I think I did around 12 knots) working from left to right, by tying about 3 knots into the last hole you did. Now look for the next hole and bringing the fabric strip from the left, the one underneath, wrap it around the one from the top and go up through the hole.


Go to the next hole and repeat -- the one from the bottom goes around the one from on top, bring it up through the hole (it now becomes the one on top). The whole rug is based on this one knot. Now, working along, you will get to the end of the very first knot, (by now, you will have removed the safety pin that is holding the "rug start" to your leg or couch arm) tie about 3 into the end hole. Turning the corner...


Now work one knot at a time around to the other end. Add extra knots into holes as you go around. When your rug gets larger, you will add on the rounded ends, not ususally on the straight sides. This will make an oval rug. There are ways to make round rugs (If you have crocheted, you know how) and also square or rectangular rugs. This one seems to be the easiest.

You are using the fabric from your strips as you tie those knots and your strips are getting shorter, then shorter, etc. When the end you are working with is around 6", remove the safety pin, attatch it to the next color strip you want to use and attatch the strip to the one on the rug using the method outlined above. Now, if you staggered you strips, one will be longer than the other, that is good, so that your joining knots will not be right on top of one another. Continue with your strips until you reach the size you would like for a finished product. This could be a small rug, a chair pad, a placemat, or it could even be a room size rug, your choice.

When it is time to end your project, pull your last knot around to the back and weave your ends around and through several previous rows until it is hidden in the colors.

I have found that as I work, at first it is easy to lay on your lap, then it starts to hang over, you don't want bubbles or knee marks in your rug, so roll it over or work on a table in front of you. Sometimes you need to lay it down on the floor to admire your work, (walk away, turn around and squink and see if you really did this piece of art) I took the makings on an airplane and had many stop and ask what was I doing...

I have laundered my rug - I used cold water, spun it really good and hung it over a chair to dry by the fire. In the summer I will probably lay it out on a table outside. You can dry it in the dryer if you want, I just wanted it to last a little longer and as it wears, it will look more vintage and homey.

Any questions would be welcomed. I wanted to share this with you, but I don't know if I was clear or not.  Enjoy your new rug.

No Sew (I Promise) Rug Making Tutorial - Part 1

Pin It
A couple of years ago, my friend was making one of these rugs. She was gracious enough to share with me the know-how. She learned it from her aunt, who learned it from an older woman probably over 40 years ago. I have made several of these and have given all but the blue one away. It is a great project to take in the car, to an outing that you have extra time on your hands, etc. Working on a flat surface when the rug gets larger will keep it flat. You can work on your lap if you want, so...

This is an attempt to do a tutorial on how I made my rug. See it here: http://wildberryranch.blogspot.com/2011/03/blue-rag-rug.html

For part 2 see  http://wildberryranch.blogspot.com/2011/03/no-sew-rug-making-tutorial-part-2.html

And, if you are really brave, check this out too. here


So, to begin

First, choose some fabric to use. Find colors that you find pleasing, there is something about working with colors that you like that will make your project uniquely yours.  Fabrics that are cotton have worked best for me. Remember that this is a rug, so very light colors will work, but will need laundering more often. Also, look for contrast and colors that work well with one another.

I scour yard sales for older sheets (not those that are worn out - but our grandmothers used old worn out fabrics from shirts, skirts, etc for their rugs- so go for it if you want). I also look for tablecloths that are not too thin, or fabric from someone else's project that they did not finish. I have found holiday prints for little or nothing. Great colors for a rug, black, dark reds, etc. Here are four fabrics for another time, another rug.

You can buy fabrics, but they will make your project expensive and we don't want that.

I usually don't wash my fabric ahead of time, but if you so desire, go on ahead if it makes you feel better.

Here is a fabric that was a tablecloth and I have used it in one of the rugs I made and still have some left over.


Notice that it has many colors, browns, reds, greens -- all make for a great floor covering, unless you want blue or pinks and this would not look so great.

Next, prepare your strips. Cut off the selvage edges, if your fabric has them. Cut a snip in the fabric and tear the fabric. This will make those strips even all the way across. Now, every 2 1/2" to 3" , cut another snip and tear it off. I use my fingers as a handy measure, count the knuckles and tear away. Just be consistant in using either 2 1/2" or 3".


There will be lots and I mean lots of loose threads. for your sake and sanity, pull them away and dispose of them. They just make a mess later.


On each and every end of the strips, fold it down about a half an inch and then fold it in half again and you will have a little corner. Cut if off, not too much, it will make a little hole.


 Now, if you cut too much off, then cut that part off and try again. You can fold these strips into color segments if you want. My daughter always plans her rugs out by laying out the fabric and she plans on which one she will use first, secondly, and so forth. I have a general idea and go with that. Do what suits your personality the best.

Here is an example of how "T" may possibly lay out for a color scheme. (OK, T, I did say possibly...) Colors can be combined to make a two-color stripe. See the light and the dark area, those are two different fabrics on my rug? Used together, they make a unique design of their own.


On my next post, I will take you through starting the actual rug. This explanation take longer than the actual doing.
 I know that there are going to be questions -- so ask away and I will try to answer them, and your question may clear up something for someone else -- so ask anyway.